

Pizza & Home Pizza Making
Pizza must be one of the worlds most popular dishes. I am lucky enough to have had an awful lot of it, and very good pizza at that. From light and airy Neapolitan style, to a crisp and cheesy New York slice and finally even onto the Chicago style Deep Dish Pizza (maybe more of a pie?). The world of pizza has evolved massively in different places as the Italian diaspora has spread over the last few centuries. This pan pizza is just one option you could make!
Making good pizza at home has always been a bit of a challenge for most people. Traditional pizza ovens make use of temperatures that are simply too high for most home ovens. Recent history has seen a departure from the supermarket oven pizza days and a rise in home pizza ovens. These can be really great tools, and I do have friends who own them and use them to great effect! They are, however, still relatively large purchases and require outdoor space. Not everyone can or wants to afford this, and that’s completely fair! This recipe gets around that by allowing you to make a delicious pan pizza at home.
Pan Pizza
Now whether or not you decide you can call this pizza is up to you. It sort of resembles a Sicilian or Detroit (closely related) style of pizza, but is really more of a focaccia dressed up as a pizza. It is, however, quite easy to make and can be made in your home oven! This dough recipe can be reused with a number of included ingredients to make delicious bread as sides.
I make mine in my trusty Lodge cast iron, but really any oven safe pan or try will work. I like making it in the cast iron as it fulfils my desire for some sort of tavern aesthetic, and it has very good heat retention. Don’t feel the need to buy one if you don’t already have one! While I think it is a great tool to have, any oven safe pan or dish will do.
This recipe may seem daunting at first if you are unfamiliar with making bread type dough, but I assure you it is actually quite simple and hard to get too wrong! You can easily start in the afternoon and ready for dinner, and with practice you can be banging these out easily!
Crispy, Fluffy Cast Iron Pan Pizza
Ingredients
Equipment
Method
- First mix the yeast, sugar and the warm water in a small bowl. This will allow the yeast to activate and start breaking down the sugar to produce CO2. This is what will give the dough it's rise.
- Mix the flour and salt in a large mixing bowl and add in the water/sugar/yeast mix.
- Mix this by hand until a rough, shaggy dough has formed.
- Add the olive oil and mix in by hand.
- Move the dough to a clean work surface and knead it by hand for 2 minutes until it comes together into an evenly distributed dough.
- Put the dough back into a bowl, cover with a towel or cling film and leave to prove at room temperature for 30 minutes.
- Reove the dough from the bowl and lift it by one side. Slap it down onto the work surface and fold it back over itself. This technique is imaginatively called slap and fold and it helps to keep air in the dough and form strong gluten!
- Repeat this proving and stretching 2 more times.
- After the final prove and stretch, leave the dough to rest for another 1.5 hours. After this it should really have increased in size and begun to show a lot of air bubbles.
- Generously oil your cast iron pan with olive oil and transfer the dough into the pan to prove again for another 1.5 hours at room temperature. Do not worry if it doesn't fill the pan to the edges. It will do after being left to rest.
- Finally, spread the dough around the pan gently with your fingers until the whole pan is filled.
- Tip your can of tomatoes into a blender.
- Add the seasonings and blend until smooth.
- Taste and add more seasonings if desired! Depending on the quality of your tomatoes, you may want to add a little bit of sugar or possibly vinegar to bring out their flavour a bit more. Be very conservative with these if you do want to add them as the sauce will become more sweet and tangy as it cooks on the pizza.
- Preheat your oven to 240°C.
- When heated, brush your dough with olive oil and put it into the oven for 10 minutes to blind bake.
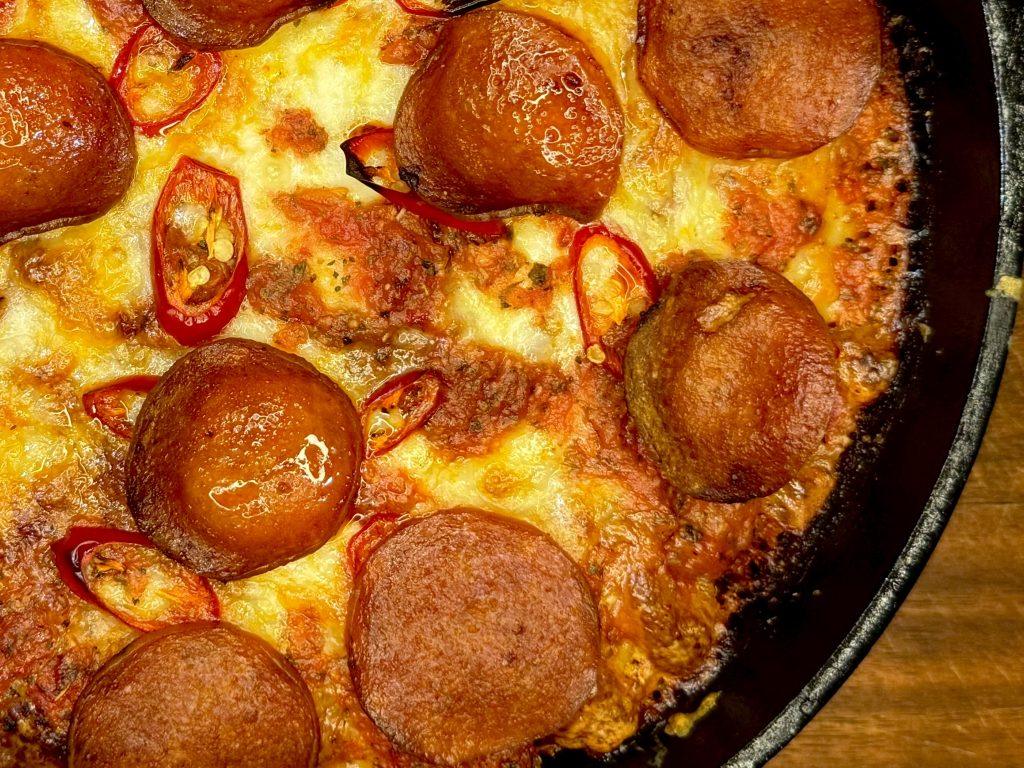
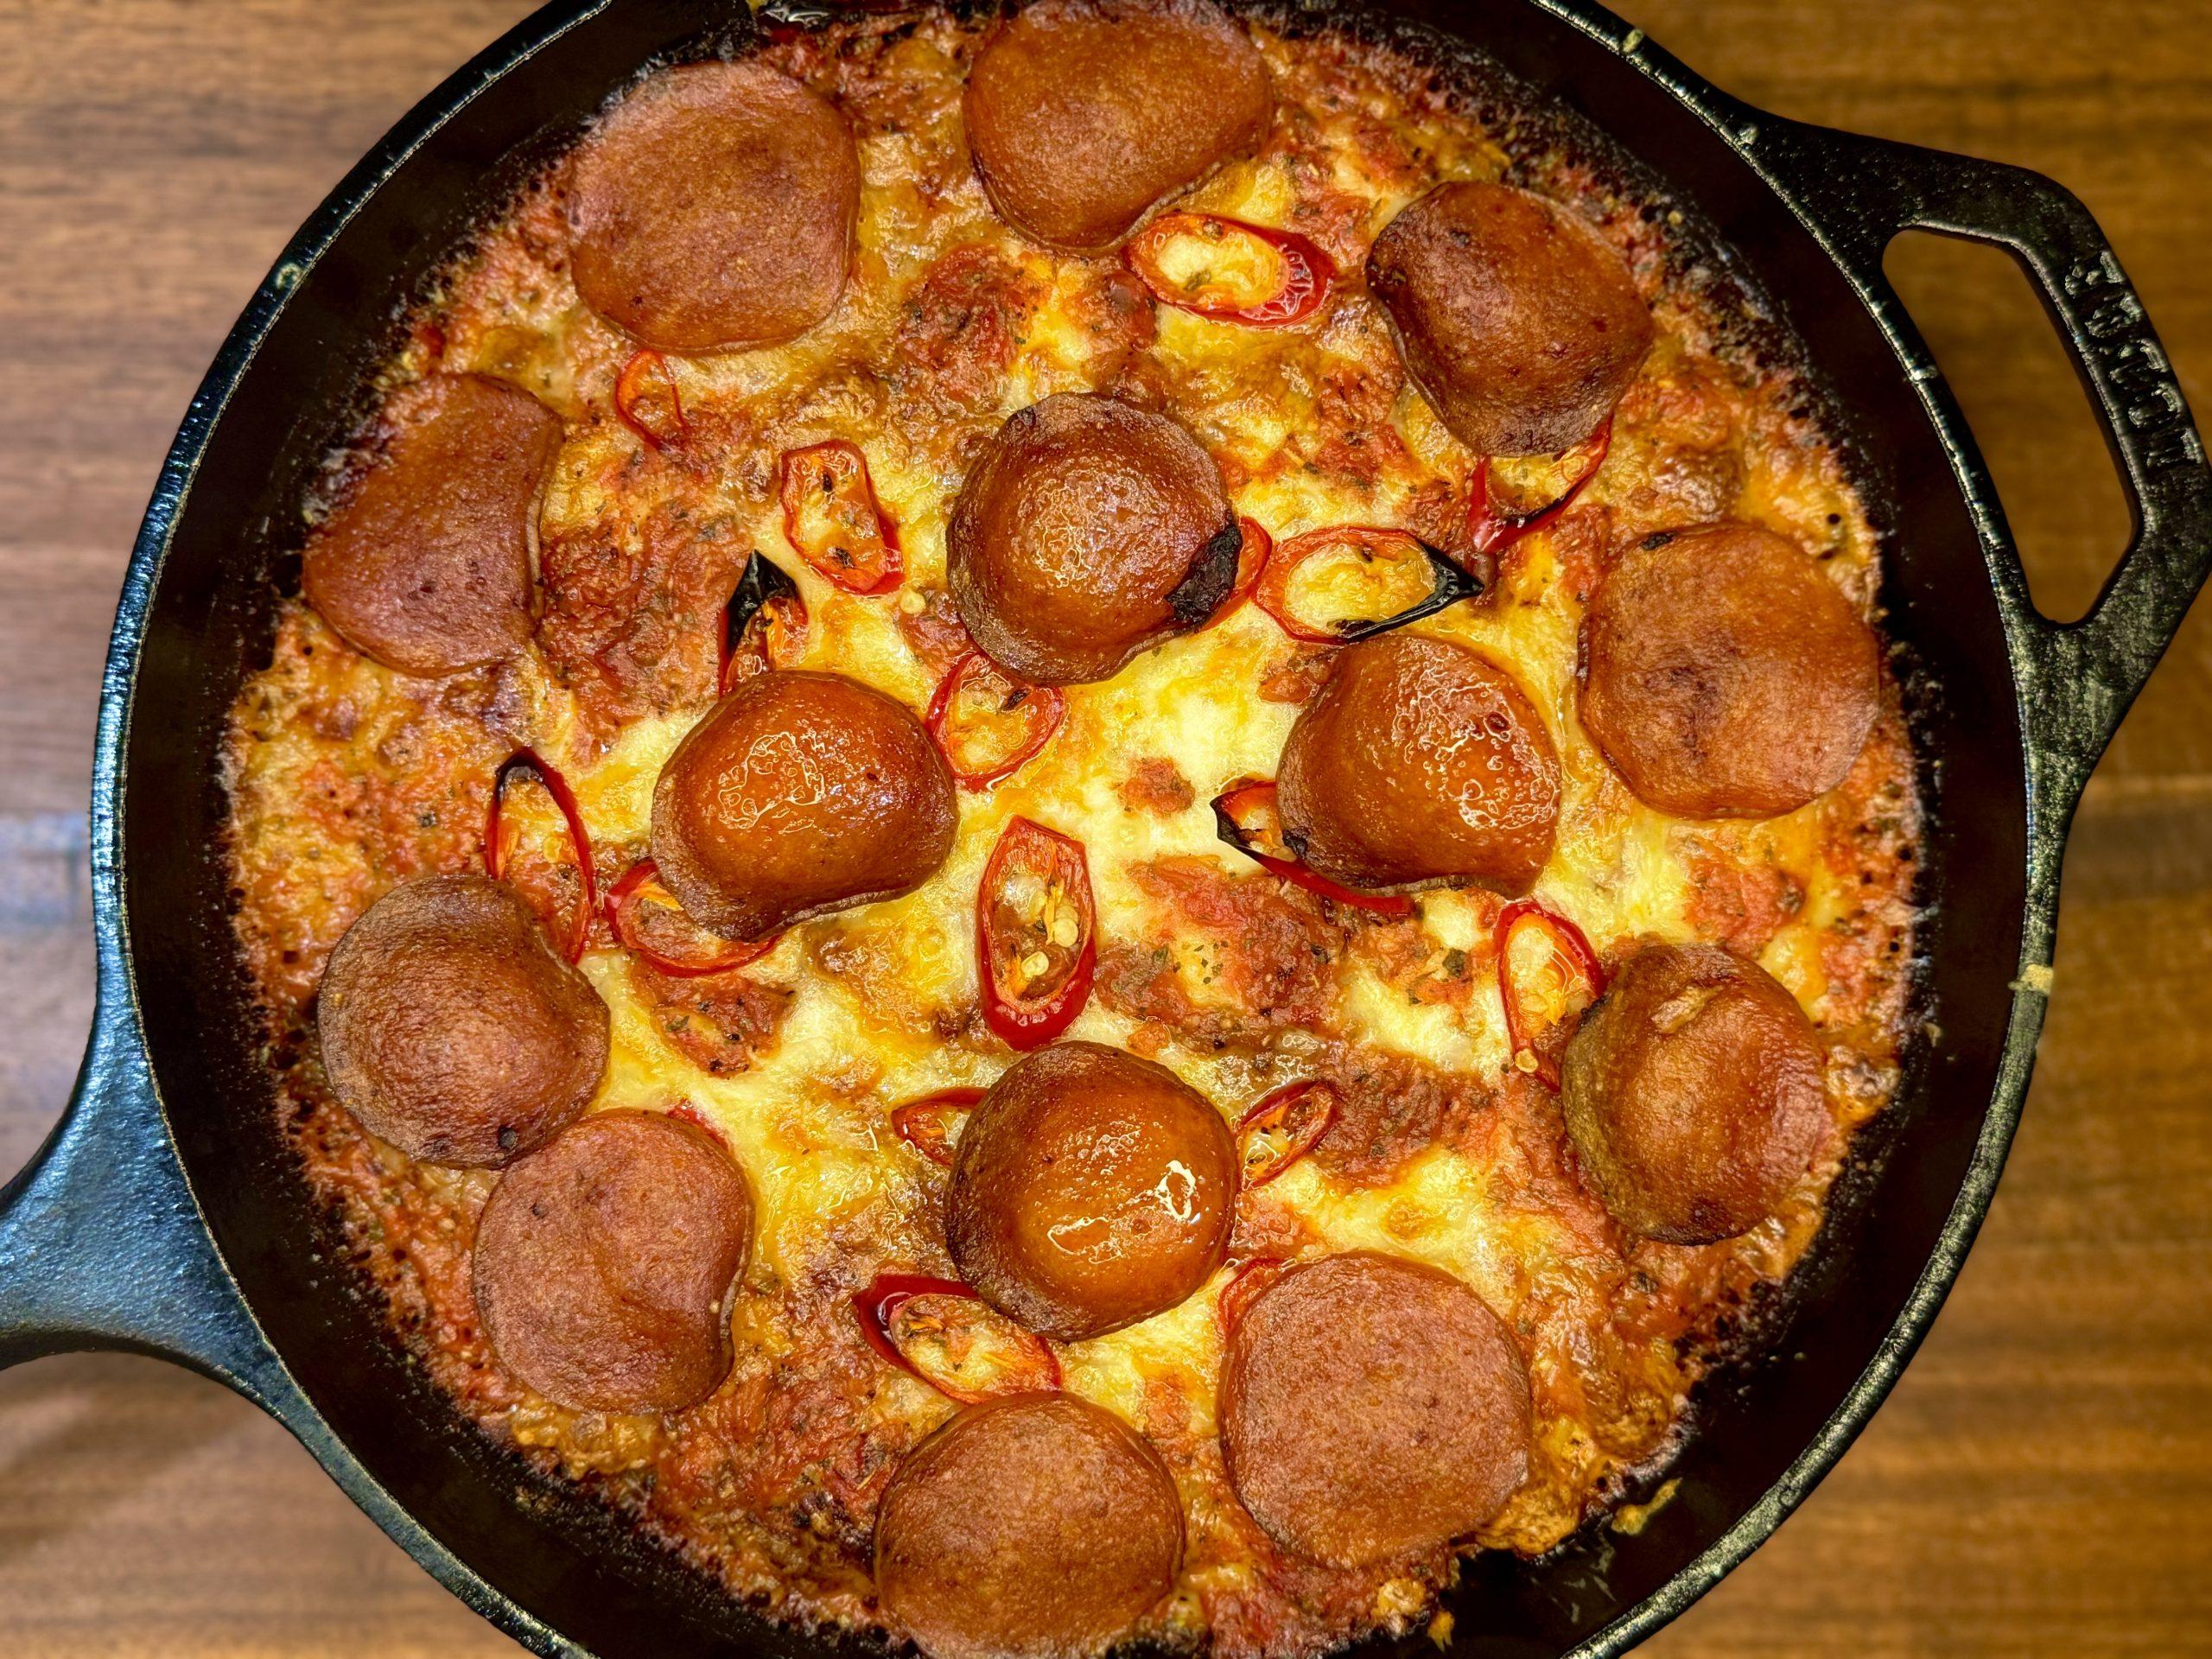
- Remove the dough and spoon the sauce on top, spreading over right to the edges with a spoon or brush.
- Scatter your cheese over the top of the sauce, going right up to the edges. Add small dollops of sauce evenly across the cheese as well.
- Add the remainder of your toppings, evenly distributed.
- Put back into the oven for 10 minutes.
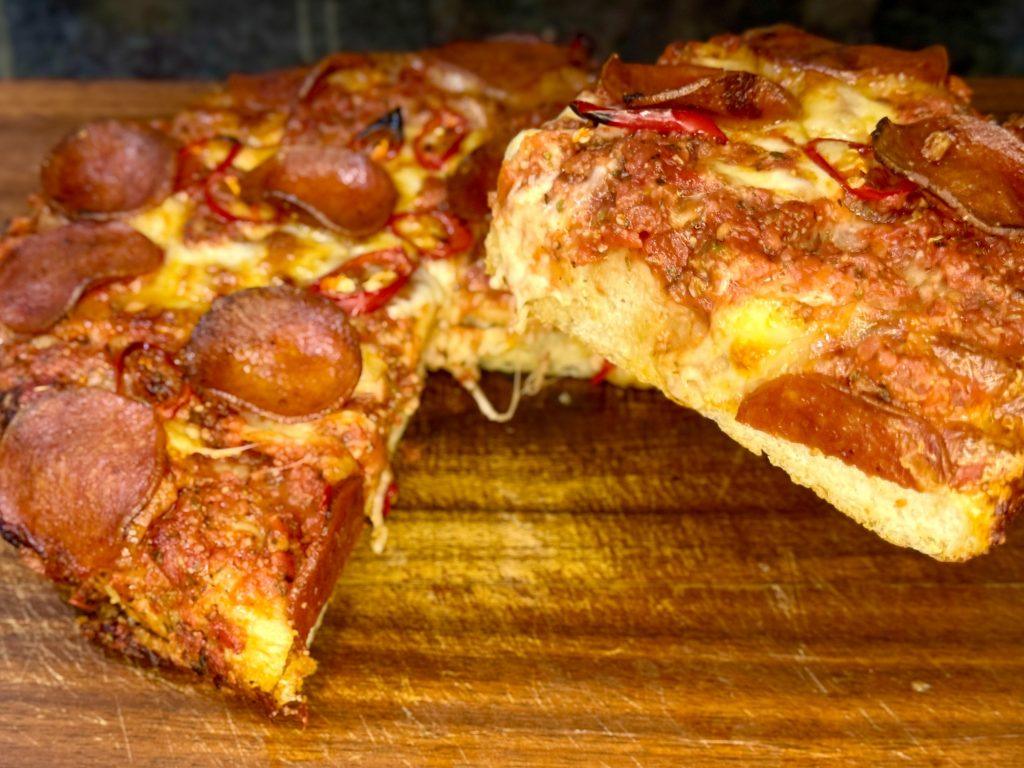
- Remove from the oven and gently use a knife, spatula or similar to release the pizza from the sides of the pan if it is a little bit stuck.
- Gently lift the pizza at one corner with a spoon or spatula and slide the pizza carefully out onto a board or rack to cool.
- Add any final toppings at the end if you have any.
- Cut into slices and enjoy!
Leave a Reply